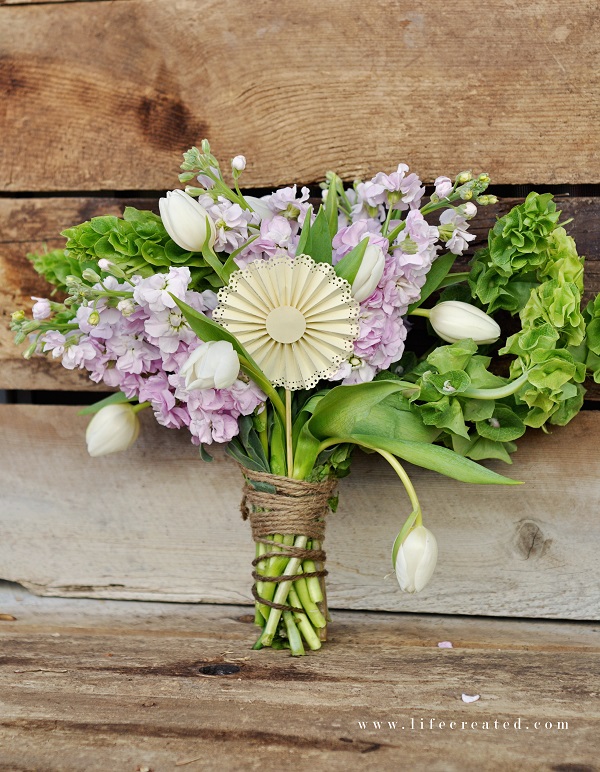
Paper Medallions, Big and Small
Bouquets and flower arrangements can be adorned with these beautiful paper medallions that cost little effort, time or money! They can be customized for whatever style you have in mind, so try different papers, punches, colors...almost anything goes!
Paper Medallions


The supplies you will need are:
- Strip of card stock (size can vary, see below, but this medallion used a 2x12 inch strip)
- Hot glue and hot glue gun
- Skewers (I used bamboo skewers from the kitchen section at my grocery store)
- Butter knife
- Ruler (metal works great)
- Self-healing mat
- Paper border punches and small circle punch (1 inch)...these are optional
How to Make Paper Medallions:
1. Determine if you want your medallion to have a straight edge or a punched/patterned edge, and cut your strip. Using a border punch will remove about 1/4th of an inch of card stock off the side, making your medallion almost 1/2 inch smaller in diameter than it would have been had you left the edge alone. Depending on what punch you use, the differences may vary. Therefore, if you want you medallion to be 3 inches in size when you are done, you will want your strip to be 1 1/2 inches wide for straight edges, or 1 3/4th inches wide if you are going to use a punch. This tutorial, which uses a 2 x 12 inch strip, ends up with a punched medallion that is almost 4 inches in diameter.. Play around with it until you get what you want.
2. Take your strip and lay it on your self-healing mat. With your ruler and the back of the knife, score your strip every 1/4th of an inch. 3. Score the entire strip and accordion fold it. 4. Adhere the 2 ends of you accordion together, and place the ring with the punched edge facing down. 
5. Use your hands to cup the top edge, slowing moving the folds in until they meet in the middle, and the medallion collapses.Use your small circle punch and punch 2 circles, one for the back and one for the front.
6. Use hot glue to secure the center with one of the circles. Do the same on the back, and apply some extra hot glue under the center to hide the skewer between 2 folds and into the glue. Your medallion is done and ready to be inserted into your flower arrangement! Play around with different edges and sizes to see what you like best.
Consider adding an embellishment on the center for some extra pizzazz, or leave as is. If you would like to see another medallion tutorial for larger medallions that can be used as decoration, please see this!


